Exam editor
The exam editor is launched from the list of your translations by clicking on the edit button. In the following figure we review the main components.
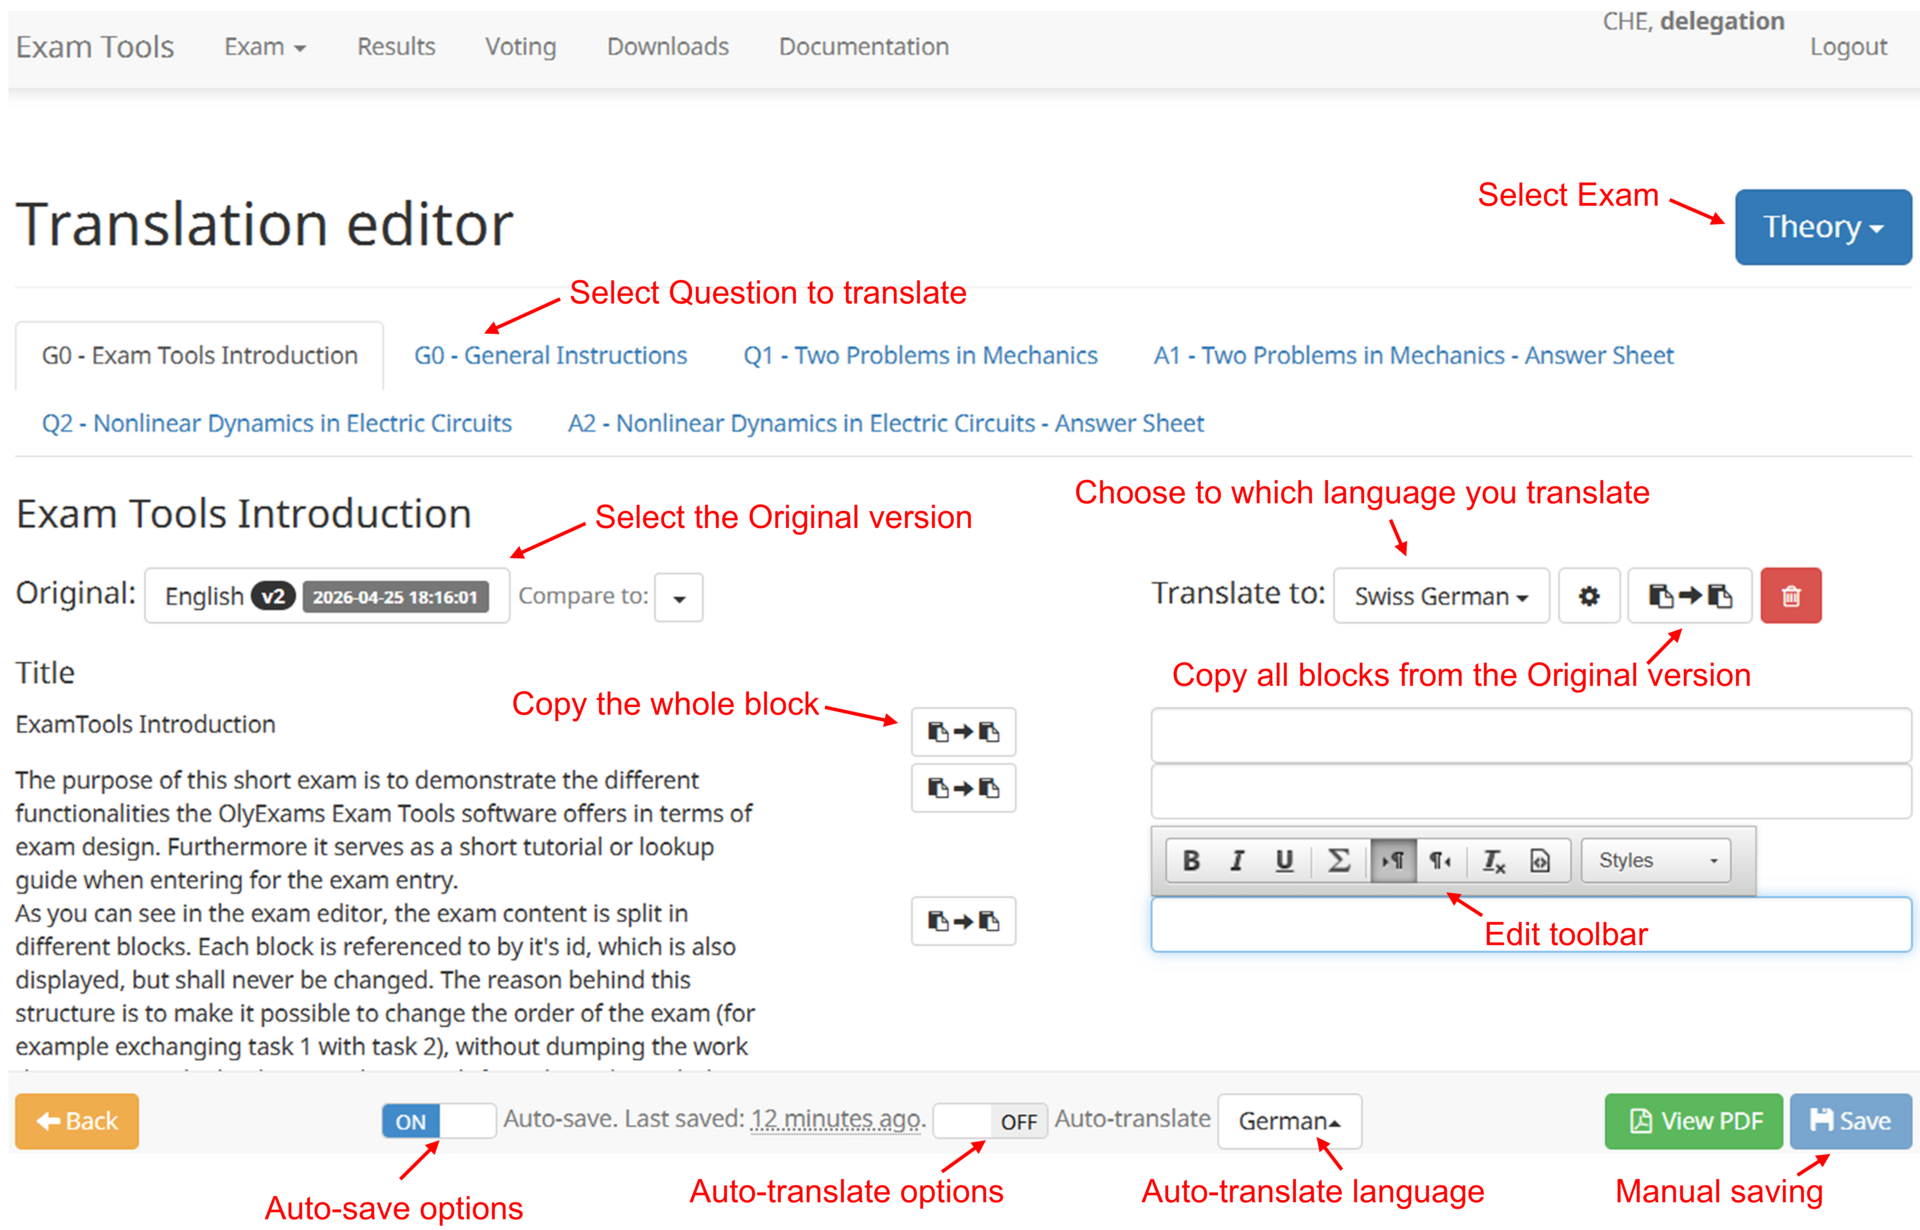
Original content
In the left column you can choose which language you want to translate from. You have the following possibilities:
- One of the official versions. (Difference between original version are also available)
- Any of your languages.
- Any language from the other delegations.
Translating content
The right column provides a set of text boxes where you can enter the translated version of the block on the left.
Simple blocks as titles only provides a simple text input. Other blocks like text paragraph can be customized more with the options in the toolbars.
Auto-translate
Auto-translate using DeepL (Google translate if language is not supported by DeepL) is also available, if enabled. When the auto-translate toggle is switched on (Note: the translation language needs to be selected before switching on the auto-translate toggle), the copy the whole block and the copy all blocks from the original version buttons convert into auto-translate the whole block and all blocks and turn blue.
![]()
Editor toolbar
Text styling
The following basic stylings are available:
- Bold
- Italic
- Underline
Equation editor
Will start a panel for editing equations.
Text direction
Useful for LTR words when editing a RTL language.
Paragraph text direction
Used to change direction of a whole paragraph.
Styles
LTR (left to right) or RTL (right to left) styles are available for selecting specific text in a mixed language box: Arabic and English text in the same box for example.
Auto-save
By default your progresses will be automatically saved. This feature can be turned off (or on) using the lower toolbar. Next to the auto-save option you find the timestamp of the last saved version.
At any time one can save the current version with the Save button.